Showing posts with label recipes. Show all posts

Friday, October 11, 2013

Homemade Maple Syrup...Well, Almost!
  
 
You're probably wondering why I said "almost" in the title.  Well, it goes without saying that maple syrup comes from a maple tree and this was made right here in my kitchen.  So just to clarify...this is syrup, it is maple flavored but it didn't come from a tree.  Think of it as a tastier version of the kind you buy in the store minus all the ingredients that you can't pronounce.  This recipe makes about four cups, or fills about four small maple syrup bottles.  I actually think it taste a lot like REAL maple syrup and less like the kind from the store.  See what you think:)
 
 
You will need:
 
4 Cups of sugar
2 T. of corn syrup
1/2 Cup of brown sugar
2 Cups of Water
1 t. of vanilla extract
1 t. of maple extract
 
Stir together first four ingredients in a saucepan until sugar dissolves.  Heat over medium heat until boiling:  boil for about two minutes.  Remove from heat and cool for 10 minutes.  Stir in vanilla and maple flavoring.  Enjoy!
 
By the way, this recipe comes from my favorite book, Christmas All Through the House from the lovely folks over at Gooseberry Patch.  They have the best cookbooks!  Feel free to check them out, but beware once you have one of their cookbooks you will want them all!  Blessings!


Friday, March 2, 2012

Mile High Biscuits


I love me some biscuits...how about you?  Smothered in butter, drizzled with honey, smeared with jam...that's what I'm talking about.  I have two recipes that I love and this is one of them.  These biscuits have endless possibilities...a complement to any meal, strawberry shortcake, smothered in sausage or chipped beef gravy, ham sandwiches...use your imagination.

Here's what you'll need:

2 cups of all purpose flour
4 t.baking powder
1/4 t. baking soda
3/4 t. of salt
5 T. of  chilled butter
1 cup of buttermilk

Preheat oven to 450 and make sure you have a rack ready in the center of your oven.  In a food porcessor combine the dry ingredients.  Cut the butter in small chunks and add to flour mixture.  Pulse until the mixture resembles course crumbs (be sure not to over mix...chunks of butter make fluffy biscuits).  Transfer to a bowl and stir in the cup of buttermilk.  Use a spoon to mix until it starts to hold together.  Turn out onto a lightly floured surface and knead until most of the mixture sticks together.  Try to work quickly so the heat from your hand doesn't  melt the butter.  Pat out into a circle about 1/2 inch thick.  Use a biscuit cutter to cut.  Continue gathering the dough and cutting until all used up (I usually get 8 biscuits)...remember work quickly with as little hand contact as possible.  Place biscuits on a pan lined with parchment paper.  Bake for about 10 minutes or until light golden brown.  Serve warm.  Enjoy...everyone needs a good biscuit in their life!


Tuesday, February 28, 2012

Olive Garden Dressing Knock Off!


I've always loved the salad dressing at Olive Garden, and I'm ashamed to even admit how much salad I eat when I go there.  There are many "knock-off" recipes floating around the web and this is the second I've tried.  I have to say this is the better of the two and I'll be using it over and over.
If you don't often make your own dressings, I'd encourage you to do so...the stuff at the store just doesn't compare and making it at home makes is so much healthier.


Recipe adapted from Food.com

You will need:

1/2 cup of mayonnaise (not miracle whip...gag!)
1/3 cup of white vinegar
1 t. of veg. oil
2 T. of corn syrup
2 T. of Parm. cheese
2 T. of Romano (note:  I was all our of fresh grated Parm/Rom. cheese so I used Kraft grated Three Cheese Blend...still taste good to me, but if you have fresh use it)
1/4 t. of garlic salt
1/2 t. of Italian seasoning
1/2 t. of parsley
1 T. of fresh lemon juice
1 t. of sugar
dash of pepper

Place all ingredients in food processor and blend for about a minute.  Transfer to a cruet.  Refrigerate for one hour before serving.


Thursday, February 16, 2012

Skillet Penne with With Chicken Sausage and Spinach


This is a quick and delicious week night meal!  Everything cooks together just beautifully and the taste is out of this world.  You only need one pan from start to finish...can't beat that!  My kids loved this...spinach included.  Using Chicken Sausage cuts back on the fat, but still delivers that spicy sausage flavor that is so good in pasta dishes.  Give it a try...it might just become one of your go-to recipes.

You will Need:


1 Tab. of olive oil
1 lb. of hot or sweet chicken sausage (turkey sausage would be good too), cut into 1/2 inch pieces
3 cloves of garlic, minced
1 1/4 cup of chicken broth
3 1/4 cup of water
8 oz. of penne or rotini (I use whole wheat)
1/2 cup of oil packed sun-dried tomatoes, rinsed, dried and chopped fine.
1/2 tsp. of salt
3/4 cup-1 cup of heavy cream
6 oz. of baby spinach
1/2 cup of grated Parmesan Cheese

Begin by heating the olive oil in a large skillet just until smoking.  Add the sausage and cook until slightly browned.  Add the garlic and cook for 30 seconds more, until the garlic becomes fragrant.  Add the chicken broth, water, pasta, tomatoes and salt.  Over medium-high heat, cook until the pasta is tender and the liquid had become thicker, about 18 minutes or so...keep an eye on it.  Stir in the heavy cream (begin with 3/4 cup and then add an additional 1/4 cup after you add the spinach if you feel the sauce needs thinning). Start adding the baby spinach one handful at a time and cook until wilted.  Remove from heat and add Parmesan cheese.  Serve immediately with an additional sprinkling of Parmesan.  Enjoy.

~adapted from a recipe originally in Cooks Illustrated, May 2007


Wednesday, February 15, 2012

Whole Wheat Chocolate Crinkle Cookies


So the other night I was really craving some chocolate (what's new) but I wanted to make something a little on the healthier side. Now please understand when I say "healthy,"I don't mean tasteless. I mean something that is just as good as it's "less healthier" counter part. The hubs and kiddos ate about half of these before they were even cooled. I'd say that's a pretty good sign that they were really good.
You will see that the recipe uses Succanat. If you've never heard of it, it is sugar in it's purest form(Succanat stands for sugar-cane-natural). It is completely unrefined, unprocessed which makes it a "whole" food. It was developed by a man in Switzerland as a way to combat cavities and tooth decay in children. Its flavor very much resembles brown sugar with a molasses overtone. I find it works very well in chocolate, but not so much in say, sugar cookies. You can find it in the health food section of most grocery stores. Give it a try if you like, otherwise just use regular sugar instead. It's up to you. Okay, here we go....

You will need:

1/2 cup of confectioners sugar
1 2/3 cups of whole wheat pastry flour or soft white wheat (same thing really)
1/2 cup of cocoa powder
1 1/2 tsp. baking powder
1/4 tsp. of salt
1 Stick of butter, at room temperature (let's hear it for butter!!!)
1 cup of Succanat (If you're using sugar make it 1 1/4 cups)
2 eggs
1/2 tsp. of vanilla.

Preheat oven to 350 and grease to baking sheets with butter.
Put the conf. sugar in a bowl and set aside.

In a large bowl combine butter and sugar/succanat until creamy. Add the eggs and vanilla, beat until well blended. Next add the flour, baking powder, cocoa powder and salt ( you can mix these separately before adding if you like, but I use my Kitchen-Aid and just throw them all in without mixing before hand). Beat on low speed just until blended.

Grab about a tablespoon of dough and form it into a ball. Roll the ball in the confectioners sugar until completely covered. Place on baking sheet about 2 inches apart. Bake for about 10 minutes, until cracked and puffed. Don't over bake, you want them to be a little soft. They will harden as they cool. Let cool on pan for about 15 minutes before removing to a wire rack to cool. Ours barely made it to the wire rack, we ate them right out of the oven...and they were good. Really made me feel like I was living on the edge eating them right out of the oven instead of letting them cool...when will the madness end??? What more could you ask for? A chocolate cookie that is healthy AND taste good...it is very possible that this may bring about world peace;) Blessings!


Smokey Potato Bake

Pay no attention to that hole on the left side of the casserole...that's where I tested to make sure they were heated through...and I enjoyed every second of it!

Hey you there...do not even think about NOT making these potatoes. They are fan-tab-u-lous! Seriously...sometimes I wonder how something so simple can taste so good. I served them with ham but they would probably work well as a midnight snack too or say in place of a birthday cake;) Really...you NEED to make these.

All you need is:

1 32 oz. package of southern style hash browns.
1 can of cream of mushroom soup
1 cup of sour cream
2 cups of 4-cheese Mexican blend cheese (you could use whatever you like)
About 4 drops of liquid smoke
2-4 Tab. of melted butter (for good measure)

Set aside about 1/2 cup of cheese to sprinkle on top.

Grease a casserole dish (make sure it's big enough to hold all the hash browns). In a bowl combine the soup, sour cream, cheese and liquid smoke. Place half of the hash browns in the pan. Spread half of the cheese mixture over the the top. Repeat again (potato, cheese mixture). Sprinkle remaining cheese over the top. Drizzle melted butter over all and sprinkle with salt and pepper. Bake at 350 for 45-60 minutes until bubbly and heated through (I checked to be sure). You can cover loosely with foil so the top doesn't get too brown, but I didn't have any problems with my oven.

Try to share some with your family:)

Philly Cheesesteak Pizza

~My kids wanted some plain cheese...so I did half and half~

I love Philly Cheese steak sandwiches and I love Pizza. So in this recipe they meet and decide they can't live without one another. And I think I can't live without this Pizza. Give it a try!


You will need:

Dough (use your favorite recipe or even store bought if you like it)
Pizza Sauce
Pizza Blend Cheese (cheddar and mozz.)
One half of a red/green pepper...whatever you want
half and onion (or more if you like)
6 shaved steaks (like Steak-um's or Philly Steaks). They can be found in the frozen meet section.
Additional 1 cup of mozzarella
Chopped Jalapenos, if desired
Olive oil
Garlic Salt

Begin by drizzling some olive oil in a Saute pan. While that heats up break the sandwich steaks into small pieces. Add to the oil. Cook and stir until almost no pink is left. When the steaks are almost done throw in the onions and peppers. Continue to saute until meat is no longer pink and the veggies are crisp tender. Stir often to prevent meat from burning. When the mixture is done, turn off the burner throw the 1 cup of mozzarella on top and cover so it melts. Meanwhile, roll out your dough and spread sauce within 1 inch of edges. Sprinkle with pizza blend cheese. Go back to your meat mixture, give it a stir to mix up the melted cheese and then spread over the pizza. Top with chopped jalapenos if you like them and then sprinkle with garlic salt. Bake at 450 (or whatever is normal for the crust you use) for about 9-10 minutes. Let sit for a few minutes before diving in. Be nice...share with those you love:)

Doesn't It look so Good???

Christmas Snowflake Fudge


Here is a easy, quick and delicious recipe that you really need to try. It takes less than 20 minutes and it tastes fantastic. I already ate one...two...no make that three pieces. I'm thinking I need to freeze it or give it away! This comes from the wonderful folks over at Gooseberry Patch. I'm a huge fan of theirs and want to encourage you to invest in some of their cookbooks. They are a joy to read time and time again.

You will need:

6 oz. pkg. of semi-sweet choc. chips
1 T. of shortening
1 cup of pecans, chopped
12 oz. pkg of milk chocolate chips
14 oz. sweetened condensed milk
1/2 cup of flaked coconut

For the first layer, melt chocolate with shortening over very low heat on the stove, stirring constantly to prevent burning. Add nuts and spread in a greased 9X9 pan that has been buttered (note this is not really a "layer" as much as it is nuts). I actually line the pan with buttered aluminum foil. Once its hard you can lift the whole block of fudge out, peel of the foil and cut into perfect squares. For the second layer combine milk chocolate chips and sweetened condensed milk over low heat, stirring frequently, until all chips are melted and mixture is creamy. Pour over nut layer and spread to cover. Lightly press the coconut into the top layer. Cool in refrigerator. Cut into small squares.

Go ahead...you know you want to make this. Have your fudge and eat it too!!!

I'll admit that I haven't always been a huge fan of Sloppy Joes, but let's face it...it's a quick mid-week meal and kids generally like it. Over the past few years I've tried a lot of different versions, but none of them have become my "go to" recipe. That is until this one. It's really good...so good, in fact, that you almost forget your eating ground beef and not pulled beef...for real! I served these with a side of coleslaw. I even threw some slaw on top of my sandwich with some cheese...oh my...I even at leftovers for lunch today. So give these a try...I think you'll be surprised that something so easy can  taste so good.

 
You will Need:

1 lb. of ground beef
2-3 celery stalks, chopped
1 Small onion, chopped
1 (8 ounce) can of tomato sauce
1/4 cup of ketchup
1/4 cup of your favorite BBQ sauce
1 T. of firmly packed brown sugar
1 t. of dry mustard
salt and pepper
1 T. of Worcestershire sauce
1 T. of vinegar

In a large skillet, brown beef, celery and onion.  Drain the fat.
Stir in remaining ingredients, simmer covered, 15-20 minutes, stirring occasionally.
If the mixture seems to loose, take off the cover and let moisture evaporate.
Cook until it reaches the consistency you like.

I recommend serving these on your favorite rolls, sprinkled with cheese and a side of slaw and fries. This is fast food at home...your kids will love it.

Tuesday, February 14, 2012

Mashed Potato Dinner Rolls


I love homemade bread and rolls, and in my humble opinion, nothing says "home" like fresh baked bread!  I made these last night for supper and they were so good.  I think I ate four, or was it five, but whose counting, anyway?  These are like a little bit of heaven on earth...warm from the oven with a big hunk of butter on top.  It's the kind of stuff dreams are made of (that and swimming pools full of chocolate, but we'll save that for another time).  Other than the rise time, these are fairly easy to make, just plan on making them about two hours before supper.  Give these a try you wont be disappointed...they are so light and fluffy...can't say it enough...they are so good!


*recipe adapted from Taste of Home

You will need:
1 package (1/4 ounce) active dry yeast
1/4 cup warm water (110° to 115°)
1-3/4 cups warm milk (110° to 115°)
1/4 cup butter, softened
1/4 cup canola oil
6 tablespoons sugar
1 egg
1/2 cup warm mashed potatoes (prepared with milk and butter)
1-1/2 teaspoons salt
1 teaspoon baking powder
1/2 teaspoon baking soda
6 cups all-purpose flour
*make sure when you add warm ingredients that they are warm, not hot,  or you will kill the yeast.  Ideal temperature is between 105 and 110 degrees.

In large bowl or stand mixer, dissolve yeast in warm water. Let stand for about five minutes.  Add the milk, butter, canola oil, sugar, egg, mashed potatoes, salt, baking powder and baking soda.  Mix (with dough hook attachment) slightly.  Begin by adding four cups of flour and mix.  Continue adding up to two cups more of flour until you get a soft dough (should be a little "sticky").  I used six for mine, but always go by how your dough looks and feels, not how many cups is called for.  After a while you just know what looks right.

Place dough in a greased bowl (turning once to grease both sides) and cover.  Place in a draft free place to rise for 1 1/2 hours.

Once the dough has risen (should be about double in size) punch it down and let it rest for a few minutes.  Divide the dough in half.  Keep the half you not using covered in the bowl.  Divide the first half into 16 equal pieces and roll into balls.  Place on a lightly greased baking sheet.  Repeat with other half.  Cover both baking sheets with plastic wrap sprayed with cooking spray.  Make sure you don't "tuck" the plastic wrap under the sheets or this will inhibit rising.  Just kind of lay it over the  top.  Let rise for 30 minutes.  Bake at 375 for 15-20 minutes, until light golden brown.


Sunday, February 12, 2012

Homemade Chocolate Pudding

Here is a quick and easy recipe to make for your kiddos (or for yourself) when you have a hankering for something chocolate.  You probably have most of the ingredients in your fridge and....just trust me on this...it far surpasses the store bought stuff.  Very basic, simple ingredients that you won't need a degree in chemistry to decipher (have you looked at the back of a pudding box!?).  I'm sorry that I don't have a picture...we ate it all before I remembered to take one.  Give this a try and I hope that you will be convinced to start whipping up your own pudding instead of using that chemical laden stuff on the store shelf.

You will need:

1/4 cup of succanat (you can use brown sugar)
3 Tab. of corn starch
3 Tab. of baking cocoa
1/4 tsp. of salt
2 3/4 cups of whole milk (I used 2%)
1/4 cup of heavy cream
1 cup of milk chocolate chips (I used semi-sweet and they worked fine)
1/2 tsp. of vanilla

Put the succanat/sugar, corn starch, cocoa and salt in a saucepan.  Wisk gently.  Add the milk and cream; wisk to combine.  Add the chocolate chips and bring to a boil over med. heat, stirring frequently.  Once it boils, turn the heat down to med/low and stir constantly until thickened.  Remove from heat and stir in vanilla.  Pour into dishes and let cool (or eat warm if you like).  For an extra indulgence throw on some real whipped cream.  Enjoy!

Friday, September 30, 2011

Kiss Your Diet Goodbye Pumpkin Cinnamon Buns!

Yup...you read that right!  Go ahead kiss your diet goodbye...at least just for today. Those who know me, know how much I love pumpkin.  You can read about my pumpkin obsession here. But for now, just know that you want NEED to try these cinnamon buns.  I started with a basic recipe, but as usual I changed it to fit my taste buds.  These take a little time, but they are sooooo worth it.  Come on Celebrate the season with me...and let your waistline go a little crazy as you enjoy one of these babies!

You will Need:
2 Packages of active dry yeast
1/2 cup of warm water (110-115)
4 eggs
1 cup of shortening
1 cup of canned pumpkin
1 cup of warm milk (110-115)
1/2 cup of sugar
1/2 cup of packed brown sugar
1/3 cup of instant butterscotch pudding
1/3 cup of instant vanilla pudding
1 tsp. of salt
7-8 cups of flour

For the Filling:
1 1/2 sticks of butter (approx.)  Some of this is used to butter your pans
1 cup of packed brown sugar
2 tsp. of cinnamon.
*The butter is for spreading on the dough and the pans.  Don't mix with the brown sugar and cinnamon.

For the Icing:
1/4 cup butter melted
3 T. of real maple syrup
1/2 cup of strong coffee
1 tsp. of vanilla
1/3 tsp. of cinnamon
5 cups of conf. sugar
*This is more of a "drizzle" then frosting, so don't be worried if it seems thin.  As it sits, it thickens.

In a large bowl, dissolve yeast in water.  Add the eggs, shortening, pumpkin, warm milk, sugars, pudding mixes, salt and 6 cups of flour.


Beat until smooth.  Mix in enough additional flour to make smooth and elastic.  I used my kitchen-aid but hands work just fine:)

Place in a greased bowl, turning once to grease top.
Cover and let Rise in a warm place until doubled, about 1 hour.
Punch dough down and divide in half.  Roll each portion into a 12-in.X 8-in. rectangle.

Brush with butter and sprinkle with half of the cinnamon filling.  Leave some space around the edges (about 1/2 inch).  Roll up jelly-roll style starting with a long side.  Pinch seams closed.


Cut each into 12 slices and place in buttered pans.  Repeat with other portion.  Cover and let rise until doubled. 

Bake at 350 for 25-28 minutes until golden brown.  Spread icing over warm buns.


Enjoy these warm from the oven with (of course) more icing drizzled on top.  You might want to schedule about 3-4 hours of treadmill time in there somewhere.  Blessings to all!

Thursday, September 29, 2011

Healthy Chocolate Milk...It's really good!

Hey there everyone.  It's been a few weeks longer than I like to go before updating my blog, but with homeschooling in full swing and a bunch of other "life" stuff, I just haven't had the time to update.  You will be happy to know that in my mind I have about 20 posts floating around...now just to get them on the computer right?  So just a quick recipe today.  My kiddos love chocolate milk...okay the hubs and I love it to, but I just cringe watching chocolate milk being made with syrup from a bottle.  It is just loaded with all kinds of ingredients that aren't that great for us.  I DO NOT claim to know everything about health food, but making changes here and there really does help in the long run.  This recipe is loosely adapted from a recipe on the Internet, but I changed up the ingredients to suit our taste.  Give it a try.  No fancy or weird ingredients needed.  I Love chocolate and if I say it's good....IT IS GOOD!

You will need:

4 Cups of milk
3 Tab. of cocoa powder
4 Tab. of PURE maple syrup...not the fake stuff!
1 tsp. of vanilla

Add all these ingredients to your blender and mix until thoroughly combined.  Serve right away or refrigerate.  If you dont' use it right away you will have to mix/shake it up again before you serve.  It kind of separates, but don't worry, it still taste great!  This is chocolate milk you don't have to feel guilty about!

Wednesday, August 31, 2011

Pumpkin Spice Latte

Since tomorrow is the first day of September (the day Fall officially begins for me) I am posting a delicious recipe.  If you like pumpkin lattes you really need to try this recipe.  Being a coffee connoisseur, I really think this is good.  The only thing that I would do different is if you have a sieve to pour the milk/pumpkin mixture through as you add to the coffee go ahead and use it. If you don't have one, don't worry, it still tastes just as good.  Here you go!

You will need:

1/2 cup of ground coffee (try to use "good" coffee...it just taste better).
1 1/2 cups of water
3 Cups of whole milk
3/4 cup of canned pumpkin
1/3 cup of packed brown sugar
Scant teaspoon of pumpkin pie spice
Whipped cream and additonal cinnamon for garnish.

Brew the coffee and water in your drip coffee maker.  Meanwhile in a large pan combine the milk, pumpkin, brown sugar and spice.  Cook and stir over medium heat until steaming.  Divide the coffee among five mugs; add pumpkin mixture.  Garnish with whipped cream and additional cinnamon.

These are soooooo.... good.  Have a great Day.

Tuesday, August 30, 2011

S'more Pancakes!

Why not do something really special for your kiddos some morning before school.  I think any kid who sees these on their breakfast plate would be a happy camper.  I have seen several adaptions of this recipe, but I really didn't follow one so I will just tell you what I did.  Take a look.

Yummy...stop drooling:)

Here's what you'll need:

Pancake mix (whatever you prefer...want mine?  Click HERE).
Chocolate Chips
Marshmallow Creme
Graham Crackers


Here's what you do:

Cook your pancakes according to the recipe you use.  Just before you flip them over throw on some chocolate chips.  Once they're done put them on a plate and slather some marshmallow creme over the top.  Sprinkle with chocolate chips and crushed graham crackers (I used cinnamon teddy grahams).  Change up the ingredients for endless possibilities.  I wouldn't recommend serving this everyday...a little sweet maybe...but definitely a really nice treat for the kids.  Blessings.

Thursday, August 18, 2011

People Chow!

The recipe I'm sharing today has many versions and variations.  However the one I use comes from this lovely Gooseberry Patch Book:

Sorry about the flash in the picture.

The recipe calls for the following:

1 stick of butter
2 Cups of milk chocolate chips
1 cup of creamy peanut butter
1 box of rice Chex (17 1/2 oz.) I have used slightly less with satisfactory results.
1 bag (16 oz.) of confectioners sugar.

Combine butter, peanut butter and chocolate chips in a saucepan.  Melt over medium heat, stirring often. Pour over cereal and mix until thoroughly coated.  Place cereal in a paper sack, sprinkle in powdered sugar.  Fold down the top of the paper sack and shake well.  makes 3 pounds or about 12 servings.


Caution:  This stuff is addicting!  Author is not responsible for any accrued weight while consuming this recipe:)  I wonder if you eat it while walking on a treadmill it "cancels" out calories?

On a different note...every time my kids and I make this recipe it recalls special memories since it's tradition that I make this recipe every Christmas Eve. Do you have a recipe that has a sweet memory attached to it?  If so, share it with us.

"I wish we could put up some of the Christmas spirit in jars and open a jar of it every month."
 ~Harlan Miller~

Tuesday, August 16, 2011

Hot Cakes!


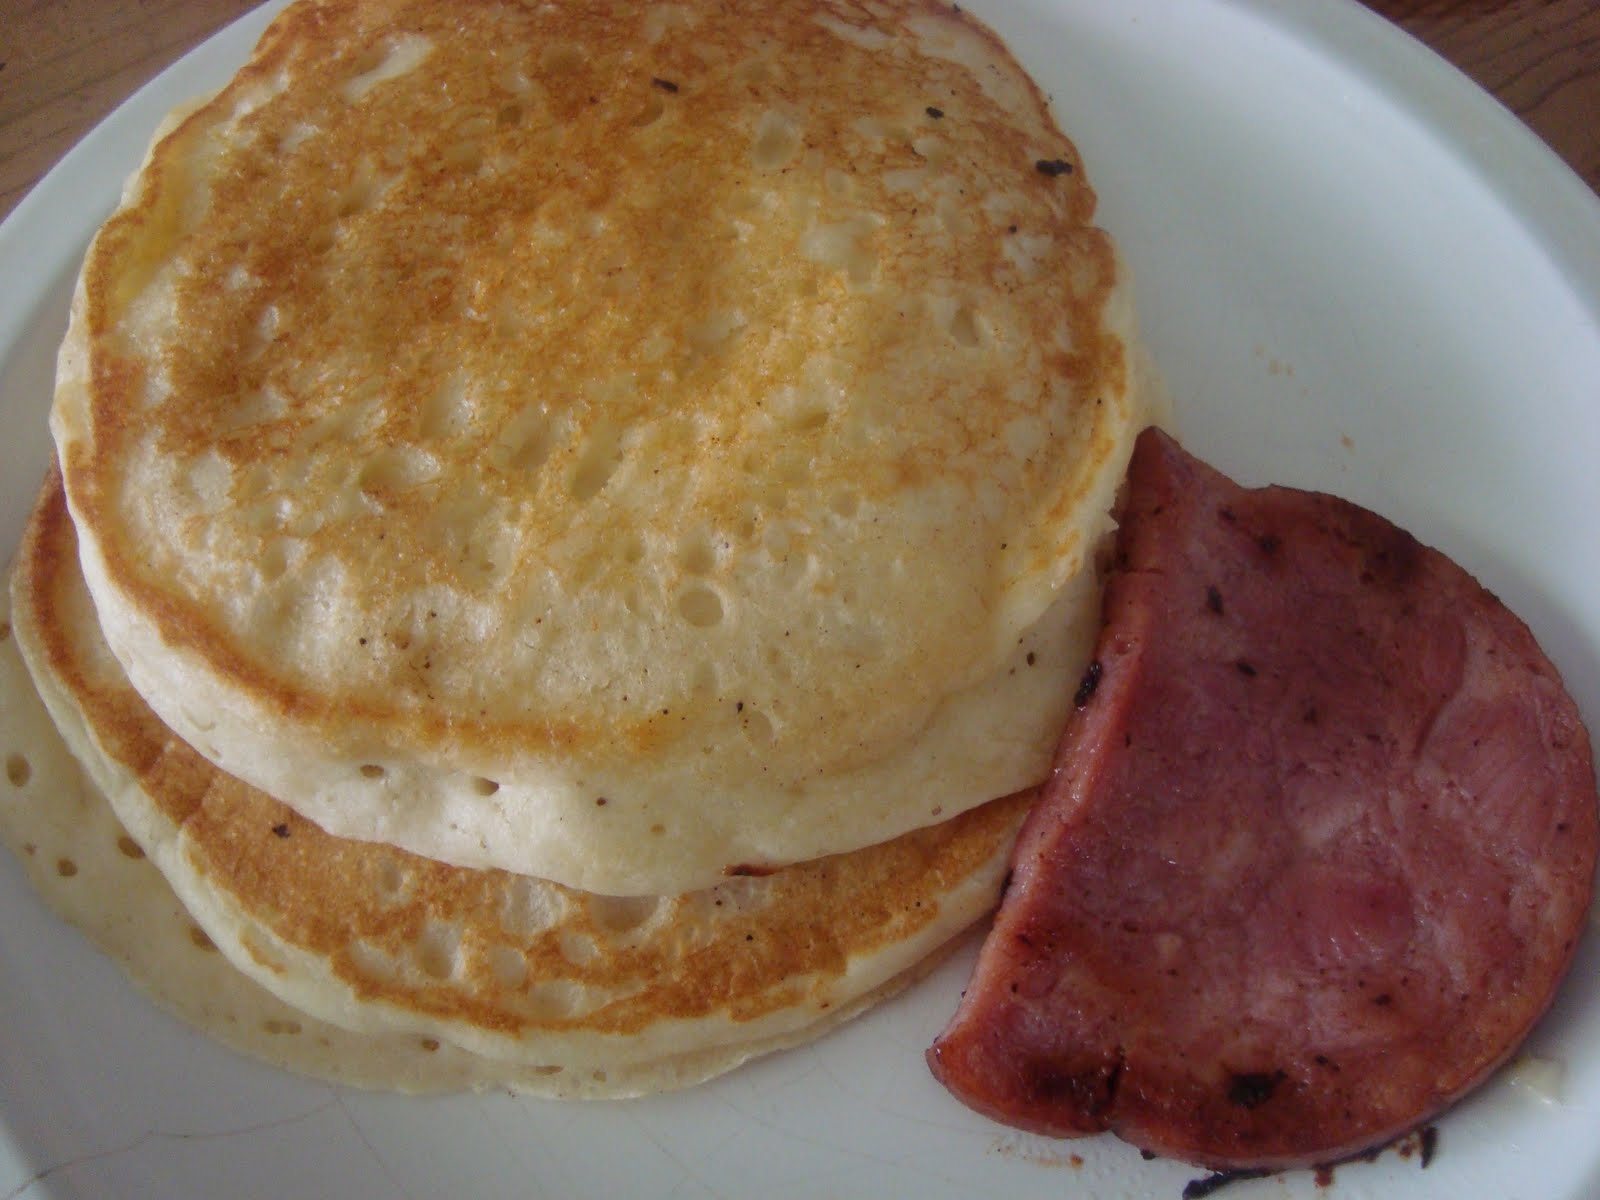
Today I'm sharing my hotcake recipe.  To me hotcakes (I prefer hotcakes instead of pancakes) are the ultimate comfort food.  I have searched high and low to find a recipe that I like.  This recipe was actually one of the more simple ones but it's become my favorite.

You will need:
1 1/4 cups of flour
1 Tab. of baking powder
1 Tab. of sugar
1/2 tsp. of salt
1 egg
1 1/3 cup of buttermilk
2 Tab. of veg. oil.

Stir together dry ingredients.  Stir together wet ingredients.  Mix together until moistened.  Don't over mix...it should still have some lumps.  It should look something like this:
Butter (use REAL butter) to grease your skillet.  Immediately start dropping batter onto the skillet (whatever size you like).  They are ready to flip when they look something like this:
Cook until the bottom is golden brown.  Quickly put these babies on a plate and put some butter on top.  Drizzle with syrup and enjoy.  Make sure you share!


Monday, August 15, 2011

Gooseberry Patch-Rise and Shine Quiche

Don't you just love the cover of this book...so cozy:)

I don't think I've found a bad Gooseberry Patch Book yet.  They are all so quaint and filled with such great ideas.  I happened to try a recipe from this book simply because I had all the ingredients on hand...and needed to use up some hash browns in the freezer.  Turns out that everyone loved it.  They cleaned the pan and asked for more.  I definitely will be making this again.

You will need:

24 oz. pkg. frozen diced potatoes, thawed
1/3 cup butter melted
1 cup of shredded cheddar cheese
1 cup of shredded Swiss cheese (I used Monterrey Jack because it's what I had)
1 cup of cooked ham diced
1/2 cup milk
2 eggs
1/4 t. of seasoned salt

Press potatoes into the bottom of a greased 9X9 pan; brush with butter.  Bake at 425 for 25 minutes: top with cheeses and ham.  Set aside.  Beat milk, eggs and salt; pour over cheese mixture.  Reduce heat to 350 and bake for an additional 25-35 minutes (depends on your oven). 

Here is is right out of the oven!

Here's the quiche ready to eat...that lovely slice of bread is homemade Maple Wheat Bread that I made today.

Homemade Tomato Sauce...Yummo!


I had a few cooked tomatoes left over from canning so I decided to turn them into spaghetti sauce.  I really, really, really love spaghetti...in just about any form.  It's even better with some homeade sauce.  I really didn't follow a recipe, but I will kind of give a rough estimate below.

I started with I'm guessing about 6 cups of tomatoes. 

I then added the following:

1 Tab. of dried parsley
1 tsp. of oregano
1 tsp. of basil
1 tsp. of italian seasoning
2 tsp. of garlic salt
1/2 tsp. of thyme
1 tsp. of salt
1 Tab. of olive oil

I basically cooked down the tomatoes a little and then added all the ingrdients.  I just kept adjusing the taste.  I added more garlic....because I LOVE garlic.  It came out really fresh tasting.  I'm really looking forward to eating it on a cold winter night.  


Thursday, June 30, 2011

Greek Pizza


If you like your veggies and well, feta cheese,then you will love this pizza. My hubby declared it the best Pizza he ever had.  I eat up comments like that!  It's taken me a while to perfect my Pizza crust.  I know how to get the perfect crust everytime...finally.  I like my crust not to thin, crispy on the bottom but still soft when you bite into it.  Feel free to use your own recipe or give mine a try.  I use my kitchen aid for the whole process, but you can easily do it by hand.  Just mix in enough flour by hand to make kneading easier and then keep adding flour as you need to acheive desired consistency.

For the Crust:
1 Cup of warm water (110-115 degrees)
1 Packet of yeast
2 teaspoons of olive oil
1 tsp of salt
About 3 1/2 cups of flour

Combine water and yeast until foamy.  Next add the olive oil and salt along with 2 1/2 cups of flour.  Stir for about 1 minute until combined.  Keep adding flour until you have pliable dough...not to sticky and not to stiff.  Grease a bowl (I keep mine right in the kitchen-aid bowl) and turn dough once to coat.  Cover and let rise in a warm place until doubled.

Once your dough has doubled, preheat oven to 450.

Punch down the dough and let rest for just a minute or two.  For this pizza I use a square pan (15x10).  I like to spray my pan with just a bit of cooking spray and then sprinkle on some corn meal.  Using your HANDS spread the dough out...this should be easy since the dough is so pliable.  Now it's time to assemble the toppings.

You will need:
Alfredo sauce
Fresh parm.cheese
Fresh tomatoes, thinly sliced
Onion
Green Pepper
Black olives
Spinach (fresh or frozen that had been thawed and drained
Feta
Garlic salt

The reason there are no exact measurements is because you really can use as much or little as you want.  Start by spreading some Alfredo sauce over the crust. Use as much or little as you want...keep in mind you don't want soggy crust.  I used a thin layer for mine.  Sprinkle some parm. cheese over the alfredo.
After you've added the parm., throw some spinach on. Spread a single layer of tomatoes over the entire pizza.  Set aside for just a moment.  Now throw some onions, green pepper and olives in a pan with olive oil.  Over high heat saute unil crisp tender.  I like to let mine sit a few minutes before I stir them, gives the veggies that nice "blackened" look which makes the pizza look rustic.  Once those veggies are done, throw them on top of the tomatoes.  Now sprinkle the feta over all.  Throw on a little more parm. if you like along with a sprinkle of garlic salt.  Now put the pizza in the oven on the lowest rack and cook for about 13-15 minutes.  The feta doesn't melt entirely so go more by the crust.  I sometimes take a spatula to lift up the pizza so I can check the crust to make sure it's crispy...but again...depends on your personal preference.
Remove from the oven and let sit about 5 minutes before cutting.  Dig in and don't forget to SHARE:)